Felicity Cloake's buffalo wings recipe is the ultimate guide to mastering this gloriously messy finger food. When she first made these in 2015, she noted that the British were not enthusiastic consumers of chicken wings. The fried chicken boom has changed that, but these tangy, spicy versions, named after the American city rather than the beast, still deserve more recognition for their perfect finger-food status while watching sports.
Preparation and Cooking Times
Prep time: 15 minutes. Dry time: 1 hour or more. Cook time: 20 minutes. Serves 4 (with sides).
Ingredients for the Wings
- 16 chicken wing pieces, or 8 whole wings
- 40g butter
- 2 garlic cloves
- 120ml sour hot sauce (e.g., Frank's RedHot)
- 2 tsp cider vinegar, or white-wine or white vinegar
- 1 tsp sugar, preferably dark brown
- Neutral oil, to fry
- 2 carrots
- 2 celery sticks
Ingredients for the Blue Cheese Sauce
- 100g roquefort, or other blue cheese, crumbled
- 6 tbsp soured cream, or creme fraiche
- 2 tbsp mayonnaise
- 2 tsp cider vinegar, or white-wine or white vinegar
- ¼ tsp Worcestershire sauce
- 1 small bunch chives, finely chopped (optional)
Step 1: A Note on the Wings
Chicken wings are generally separated into two cuts: drumettes (the bits that look like tiny legs) and flats (the other bits with two bones running parallel towards the triangular wing tips). If your wings are not already separated, you can keep them whole, but they are far easier to eat if you break them down before cooking.

Step 2: Split the Wings
To do this, put a chicken wing flat on a board, then pick up the drumette end so the wing stretches out into a natural V. Using a large, sharp knife, feel around for the point of least resistance in the joint and cut down vertically with a decisive stroke; you should not need to use too much pressure. Repeat with the other wings. If you like, remove the wing tips, too (save those for stock), but it is rarely necessary.
Step 3: Dry the Wings
For the crispest results, air dry the wings before cooking. You can do this before or after separating them or, if you do not have the time, skip this step entirely. Spread out the wings on a rack set above a tray or bowl, then put in the fridge uncovered for between one and 12 hours.
Step 4: A Note on the Sauces
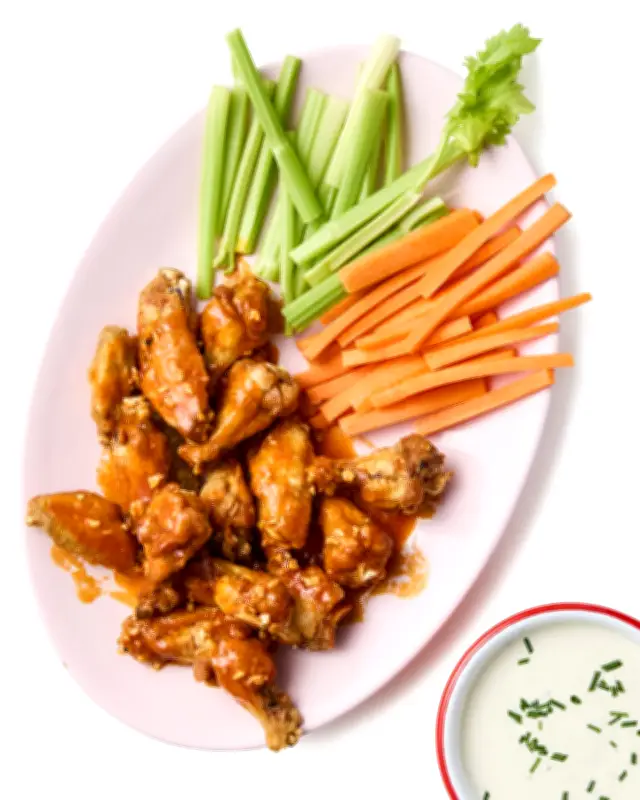
Buffalo wings are traditionally served with two sauces – one to coat the chicken, the other for dipping – plus some crudites as a cursory nod to a balanced diet. You might prefer just to make the first, a piquant, sweet-and-sour sauce, but the other elements are recommended for the full experience.
Step 5: Start on the Coating Sauce
For the coating sauce, melt the butter in a small pan on a medium-low heat. Peel and crush the garlic, then fry it in the hot butter until it is fragrant but not coloured. Pour in the hot sauce – the tangy but fairly mild Frank's RedHot is a good choice, but use your preferred brand. Bear in mind that anything too spicy will be incendiary in this context.
Step 6: Finish the Coating Sauce
Taste the sauce: if it is already very tangy or sweet, you may like to adjust the amounts of sugar and vinegar accordingly, before adding them now, or add a little extra touch of your own in the form of a pinch of salt or smoked paprika, or a teaspoonful of mustard. Take off the heat and set aside.
Step 7: Make the Blue Cheese Dip
Mash the cheese (roquefort's soft, creamy texture and intensely savoury flavour makes it a preferred candidate, but feel free to substitute another cheese of your choice) with the soured cream until the mix is fairly loose, then stir in the remaining ingredients and adjust the seasoning to taste.
Step 8: Fry the Wings
Fill a large pan by a third with neutral oil and heat it to 170C (alternatively, use a deep-fat fryer). Turn on the oven to low, and line an oven tray with kitchen paper. Pat the wings dry, then fry in batches, so as not to overcrowd the pan, for 10-12 minutes, until golden and crisp all over. Make sure the oil comes back up to temperature before adding subsequent batches of the chicken.

Step 9: Prepare the Crudites and Serve
Meanwhile, scrub the carrots and de-string the celery, then cut both into batons and arrange these on a platter. Once the first batch of wings is ready, keep them warm on the lined tray in the oven while you fry the rest of the wings. Put all the cooked chicken on the platter, drizzle over the hot sauce (this keeps the wings more crisp than tossing them in the sauce) and serve with the dip.